How to fully backup a linux server to B2 Backblaze with Hashbackup
November 3, 2016
How to connect multiple Smart Life devices from Amazon
January 22, 2018Setting up BunnyCDN with your WordPress site is simple. It only takes a couple of minutes and can be done in 4 simple steps.
Step 1: Create a pull zone
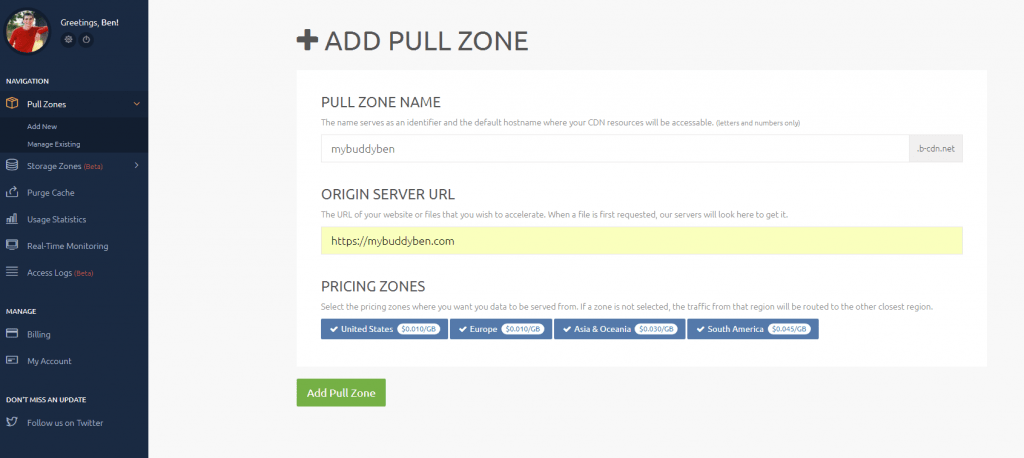
First thing first, you need to create your pull zone. To do this, simply go to your BunnyCDN control panel, enter the name of the pull zone and enter the URL of your blog as the Origin URL. For a more advanced info check out How To Create Your First Pull Zone
 Step 2: Install WP Rocket plugin
Next, we will install the WP Rocket plugin. This will enable your WordPress site to use the BunnyCDN. Purchase WP Rocket from their Official website (https://wp-rocket.me) and receive the zip file with the plugin inside. To install it, simply go to Plugins->Add New, Click the “upload plugin” button at the top, and click on Install Now. After the installation is finished, click on the “Activate plugin” button.
Step 3: Configure WP Rocket to use a CDN
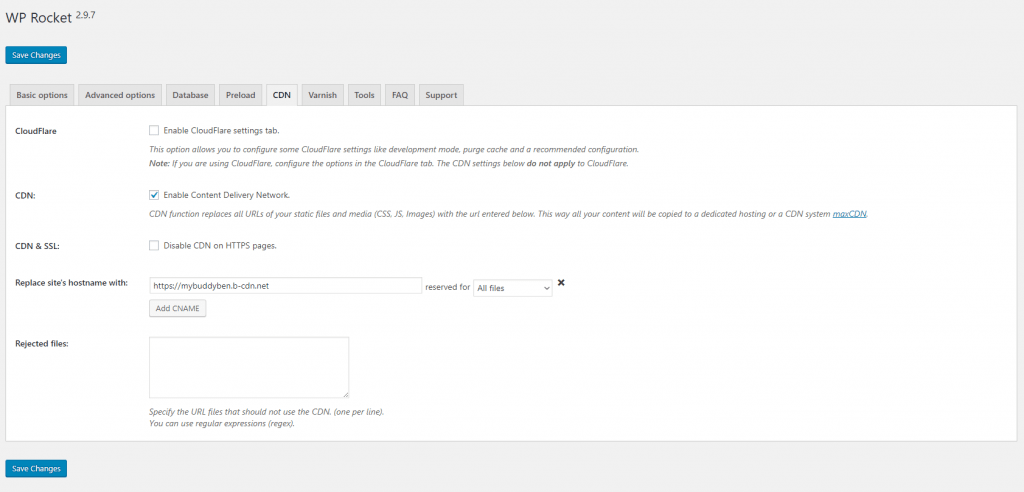
In order for WP Rocket to use BunnyCDN as your CDN, you need to set some things up. First, go to Settings->WP Rocket from the WordPress sidebar (alternatively you can use the WP Rocket drop down menu at the top of the admin panel, and select Settings.) Then click the “CDN” tab and you’ll see this section in the screenshot. Click on the checkbox beside “Enable Content Delivery Network.”
Step 4: Configure WP Rocket to use BunnyCDN
While still in the CDN tab, scroll down to the configuration section and enter the hostname you have created in step 1 into the “Replace site’s hostname with” field like shown on the screenshot. Click on Save Changes and you’re done. Your WordPress site is now using BunnyCDN and should load much faster for users around the world.

