How to upload 60fps 1080p Videos to Google Photos
September 14, 2016
How to set up BunnyCDN with WordPress using WP Rocket
June 29, 2017In this guide, I’ll show you how to backup your server with Hashbackup and send it to B2 Backblaze cloud storage. We all hate the idea of losing your server files, or we’ve all experience the dreaded server RAID hard drive crash.. Well this is a foolproof way to prevent the headache that comes with a server crash. Once you set this up on your server, you’ll have ease of mind from any worry that a complete snapshot of your linux server is saved off-site to a cheap but reliable cloud host. It will be encrypted and compressed before being uploaded. This will backup all files from your root of server, and even MYSQL databases.
This is an easy way to backup your Linux server to B2 Backblaze!
This includes VPS and Dedicated servers that run Linux.
I’ve used it already to backup and restore my VPS server which was using CWP (Centos Web Panel); after restoring I only needed to update CWP to the new IP address, and rebuild my apache vhosts. Everything else such as MYSQL, passwords, files, settings, SSH settings, and software worked perfectly!
Requirements
- Hashbackup (Download link)
- B2 Backblaze Cloud account (Link)
- CentOS 6 (64bit, I recommend) [This can work with other OS, I’m just showing how I set it up on my server with my specs]
Step 1. Setup B2 Backblaze Cloud
We first need to create your account and get your Account ID, and Application Key. Once you have signed up, and linked your account to a debit/credit card incase you go over your limit, you’ll find your ID and Key on the Buckets page.
1a. Create a Bucket
You need to create a container/bucket to store your server files in from the backup. Simply click Create Bucket button on the “My Buckets” page of your b2 Backblaze cloud account. Copy the following details into a notepad or save it somewhere. You’ll need it to setup Hashbackup
- accountid
- appkey
- bucket name
1b. Add payment information
If you haven’t already, you’ll need to add a debit or credit card for B2 Backblaze Cloud to charge if you go over your limit like Download bandwidth, or Storage space. They charge once you meet a threshold, and once a month. Be sure to add a card so your backups continue to work.
1c. Set your Account Bandwidth and Storage limits
Go to your Caps & Alerts page and set your limits. I’d suggest allowing yourself to download the amount your server can hold. If your server has 180GB of storage, then at least set that as the download cap so when you go to restore, it will have enough to allowed bandwidth to do what it needs. Set your Storage cap the same way if you prefer.
Or you can remove the Caps and set it as “Unlimited”
But either way, make sure to allow your server enough to do its job properly.
Step 2. Setup Hashbackup on your Server
If you haven’t already, download Hashbackup. If you’re using a 64bit server, then grab the “linux-64bit.tar.gz”
Copy only the “hb” file to your server in the /usr/bin folder.
Be sure to make it executable! File permission 755 on the hb file.
2a. Initiate Hashbackup
Now that HB is installed on the server, time to set it up correctly. Run these commands
hb init -c /root/hbdir
Change hbdir to whatever name folder you want to create to store the backups in locally, then send to B2 backblaze. If you don’t care, then just leave it the way it is. If the directory already exists, it must be empty or init will complain. During initialization, an inex.conf file will be created, listing files that should be excluded from the backup. You may want to review and modify this before your first backup.
After running the command above, COPY THE KEY.CONF file to your computer locally and BACK IT UP! You must have this file to restore any backups in the future!!
Do NOT edit the key.conf at all
2b. Exclude files you don’t want to backup
In the “inex.conf” found inside “/root/hbdir” folder, you can tell Hashbackup what files and directories to ignore when backing up. By default after running the init command, it will make the file and add this.
 ex /home/*/.bash_history
 ex /home/*/.emacs.d
 ex /home/*/.gvfs
 ex *.vmem
 ex /proc/
 ex /tmp/
 ex /var/tmp/
You can add more directories or file types to ignore following the pattern above.
2c. Add B2 Backblaze login details to Hashbackup
We need to create a blank “dest.conf” file in your /root/hbdir folder. You can do this with this SSH command
cd /root/hbdir
touch dest.conf
Then edit & paste this in the file
 destname b2
 type b2
 accountid 123456789012
 appkey 1234567890123456789012345678901234567890
 bucket hbbackup
 dir myhost1
Replace the accountid, appkey, and bucket with the details you had in Step 1a.
Replace “myhost1” after dir with your server hostname. You can choose anything really. This is the folder it will store inside the b2 bucket. I prefer to set this to the server hostname. e.a. (s1.example.com)
Then save the file.
MAKE A COPY OF DEST.CONF along with KEY.CONF from Step 2a; These are the two files you require to restore your backup from the cloud.
Step 3. Setup a Routine (Cronjob) for Daily backup
What I like to do to make things easy, is put this into a single sh script to run with Cronjob. Makes it a lot easier and cleaner.
Create “backup.sh” file in your /root directory and paste this in it
#!/bin/bash
/usr/bin/hb log backup -c /root/hbdir /; /usr/bin/hb log retain -c /root/hbdir -s3d2m;
This will make complete backups of your server from /
It will store the last 3 backups, and 1 single extra backup from the last 2 months. Change the 3 and the 2 to suit your need. I prefer it this way. This will also auto-upload your backup’s to B2 Backblaze Cloud, encrypted and compressed. It will delete the older backups aswell to save storage.
Save the backup.sh and make it executable (755 file permissions)
Step 3a. Create the Cronjob
This will make the server run the backup.sh on a daily schedule. Once a day it will run this and perform the SH script. Be sure that the sh script is executable (755 file permission)
Open up your crontab to add the cronjob with this command
crontab -e
Then paste this
0 0 * * * /root/./backup.sh
Then to save and close do this
Press Ctrl + Q
type :wq
Hit enter
You’ve just added the cronjob to the crontab. You can do “crontab -e” to be sure it’s there.
You’re done!
You just
- install & setup hashbackup,
- created a B2 Backblaze account
- connected b2 with hashbackup
- created a backup.sh script
- created cronjob with crontab to run the backup.sh daily
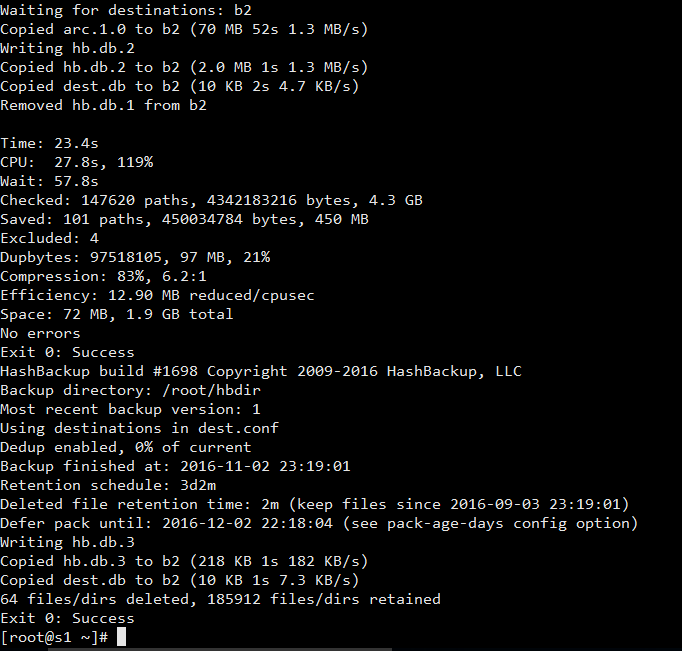
Wait 24 hours, then check your B2 Backblaze buckets on your account page, and see if you see new files and storage being taken, if so, then it’s working correctly!
If you want to manually force a backup, just run /root/./backup.sh
I’ll write a new post on how to recover your server with B2 Backblaze using Hashbackup soon. But to put it simply, you need to copy your “dest.conf” & “key.conf” on the new server in a folder “/root/hbdir” then run this command
hb recover -c /root/hbdir
then when prompted, type y and hit enter with the question “Proceed with recovery?”
Cheers! Leave a comment if you had issues, or happy that I wrote this guide 🙂 Hope you found it useful!


